Banner, Menu Bar, and Show Alerts
The banner and menu bar are located at the top of the viewable area of the browser.
Use the banner logo and menu bar to navigate to the Home page, access common menu commands, and view alerts of any errors, warnings or informational messages.

Banner
The banner extends the width of the logo from the left side. On the banner, click the Logo to go to the Home page.
Menu Bar
The menu bar extends from the right of the Logo to the right side. The menu bar contains the following menus and commands.
NOTE: The active page in the system determines the availability of menus and commands. For example, more menus and commands become available when a case is open.

Use the Open Items menu to move among multiple open cases and contacts. The list of items sorts from most recent items at the top of the list to least recent items at the bottom of the list.
Move among Open Items
- On the menu bar, click the Open Items menu and then click an item in the list to go to the selected item.
- The selected item is active until you close the item, select a different item from the Open Items menu, or click a navigation button to go to another system page.

Use the Save menu to save open cases and contacts or to create a copy of a case by saving the case with a new name.
- Click Save to save the active case or save the active contact.
-
Click the Down Arrow to the right of Save and then click Save As to save a case with a new name or folder location or as a user-defined template, which creates a copy of the active case.
 You cannot save In-Force cases or Multilife or Composite concept cases as user-defined templates.
Save a Case
When you create a new case or update an existing case, do the following to save the case.
-
On the menu bar, click Save.
If you did not save the illustration with a case name, the Save dialog box opens.
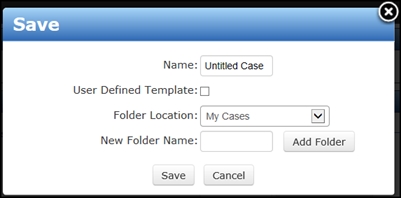
- On the Save dialog box, type a Name in the box.
-
In Folder Location, select an existing folder from the list.
To add a new folder for the case, type a folder name in New Folder Name and click Add Folder.
 All cases initially get stored in the preset default My Cases folder until you add and use your own folders in Case Management. For instructions, see Case Management.
 - Click Save to save the case and return to the previous page.
Click Cancel or the close button to not save the case and return to the previous page.
Save a Contact
- Add a new contact or edit an existing contact. For instructions, see Contact List.
-
On the menu bar, click Save.
The system saves all of the contact's data.
Copy a Case
Save a case with a new name to make a copy of the case.
- On the menu bar, click the Down Arrow on the right of the Save button and then click Save As.
-
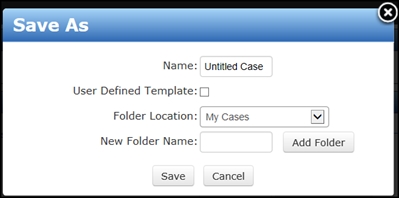
On the Save As dialog box, type a Name that is different from the originating case name.
-
In Folder Location, select an existing folder from the list.
To add a new folder for the case, type a folder name in New Folder Name and click Add Folder.
-
Click Save.
Click Cancel to close the dialog box without saving the case.

- Click the Close button on the menu bar to close the active item (case or contact).
-
If you did not save the item or it has unsaved changes, the Close dialog box opens.

-
On the Close dialog box, click one of the following buttons.
Yes to save your changes. If the open item is a new case, the Save dialog box opens so you can save the case. If the open item is a case that has errors, the Yes button is not available.
No to close the item without saving it.
Cancel to return to the item without closing it.
NOTE: If you do not save a new open item before closing, you can close ForeSight, log back on to ForeSight and then go to Unsaved Items in the Home pages to restore the unsaved items. For instructions, see Unsaved Items.

Use the Help menu to open Help and view system information.
- Click Help to open the ForeSight System Help in a separate browser tab or window.
-
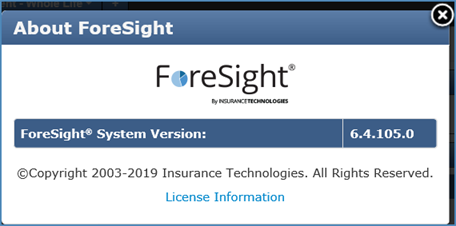
Click the Down Arrow to the right of Help and then click About ForeSight to open the About ForeSight dialog box for viewing the ForeSight system version. Click
 on the upper right of the dialog box to return to ForeSight.
Show Alerts
Use the Show Alerts icon and link on the right of the menu bar to view alerts for any errors, warnings or informational messages in a display grid. ForeSight displays an icon for the highest level of alert next to the Show Alerts link. All errors activate the Show Alerts link.
The ![]() icon indicates no alerts, and the
icon indicates no alerts, and the ![]() icon indicates errors exist.
icon indicates errors exist.
![]()
![]()
The following icons indicate the severity of the alert or error:
![]() icon indicates the most severe error is a fatal error.
icon indicates the most severe error is a fatal error.
![]() icon indicates the most severe error is a warning.
icon indicates the most severe error is a warning.
![]() icon indicates an informational message only.
icon indicates an informational message only.
Use the message icons next to entries for viewing alert messages that provide warnings, additional information, and guidance for correcting errors.
- Page error icons display next to the erroneous input on the page.
- Schedule error icons display in the left most column of the schedule row.
- Table Input error icons display in the column header.
- Error icons do not display on the Quickview or Reports pages. If an error occurs on one of these pages, the icon and Show Alerts link become active on the menu bar.
NOTE: Set the Alerts Display Grid option in the System section of Preferences to have the Show Alerts display grid automatically open or open only when clicked. For instructions, see Preferences.
On the right of the menu bar, click the Show Alerts icon or link to open the Show Alerts display grid and view all messages for the case.
- Left column displays an icon to indicate the severity of the alert.
- Message column displays the alert message.
-
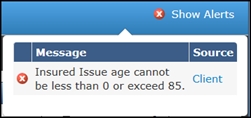
Source column contains links to the case page location of the alert. Click a Source link to go to the page where errors exist.
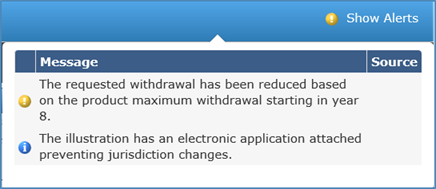
- Click the Show Alerts error icon or link on the right of the menu bar to open the Show Alerts display grid.
- In the display grid Source column, click a link to go to the page where an error icon
 appears next to the invalid entry.
 -
Point to the
 icon to view the alert message.
In the following example, the Issue Age entry on the Client page exceeds the maximum value.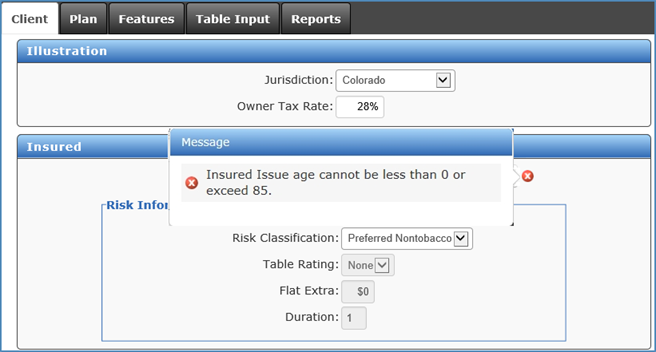
-
Make the required changes to correct the error and tab to (or click in) another field to clear the alert.
-
Click the Show Alerts icon or link to view any additional errors or warnings and case page locations.
View and Correct Schedule Errors
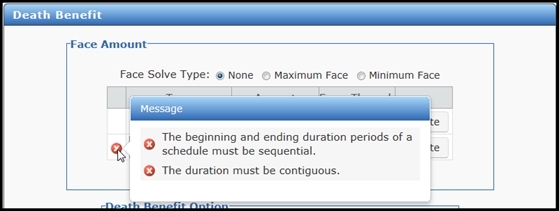
In schedules, the first column on the left displays alert icons. Point to the icon to view the message for the schedule row and then make changes to the schedule to fix the error.
View Table Input Page Errors and Messages
ForeSight displays errors and messages differently for the Table Input page.
- An alert icon is located in the column header.
- The message includes a list of the affected cells.
- Each cell in the column that is in error displays the text in red.
- When you select a solve in a schedule on a case page, solve error messages do not display on the Table Input page because you cannot correct them on this page.
